Project pages

 InstallMate Builder displays your project's contents in different pages, organized by section and purpose.
Project page navigation
You can navigate between the project pages using one or more of the following methods:
- By clicking on the page title shown in the navigation pane at the left;
- By clicking on the arrow buttons in the title bar of each page;
- By hitting the Ctrl+PageDown (next page) or Ctrl+PageUp (previous page) keys;
- By using the View menu commands from the main menu.
Using the navigation pane
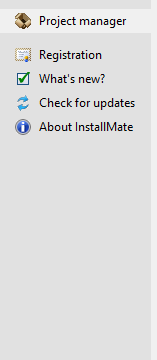
The navigation pane is located on the left side of the InstallMate main window. It contains project page titles, plus a number of quick help commands (see screen shots on the right). To show a project page, click on the corresponding page title in the navigation pane.
Using the page arrow buttons

The title bar at the top of each project page contains two arrow buttons. Clicking these buttons takes you to the next (right arrow) or previous (left arrow) project page. Clicking on the question mark button opens the help viewer with information about the current project page.
Using Ctrl+PageDown and Ctrl+PageUp
The keystrokes Ctrl+PageDown (next page) and Ctrl+PageUp (previous page) are the keyboard equivalents of the white arrow buttons. They operate exactly the same as the arrow buttons; in particular, they too move only between project pages in open sections.
Using the View menu
All project pages are also accessible through the View menu on the main menu. Each project section corresponds to a submenu; the actual project pages appear on the per-section submenus.
Available project pages
InstallMate Builder contains the following project pages, listed in the same order as they appear in the navigation pane.
| Project page | Description |
|---|---|
| Project manager | Start page to create new projects or open existing ones |
| Project overview | Displays a summary of your current installation project and its installation packages |
| Product info | General product identification for use by installer and Windows |
| Requirements | System requirements and prerequisites to satisfy before installation |
| Prerequisites | Pre-installation prerequisite handlers |
| Components | Physical (developer) and logical (end-user) organization of the product |
| Files and folders | Files and folders to install for the product |
| Registry | Registry keys and values to install for the product |
| INI files | INI file values to install for the product |
| Environment | Environment variables to install for the product |
| File types | File type associations to install for the product |
| COM classes | COM class information to install for the product |
| Services | Services and device drivers to install for the product |
| Installer options | Installer settings for the installer |
| User interface | Product registration options for the installer |
| Languages | Localization languages for the installer |
| Dialogs | Installation screens for the installer |
| Actions | Installation actions for the installer |
| Messages | Various text messages for the installer |
| RichTexts | Formatted texts for use in the installer dialogs |
| Bitmaps | Images for use in the installer dialogs |
| Icons | Icons for use in the installer dialogs |
| Font styles | Font styles for use in the installer dialogs |
| Variables | Repository of symbolic variables |